Quick Summary
- Modern approach: Use String Catalogs (.xcstrings files) instead of traditional .strings files
- Automatic detection: Xcode automatically discovers localizable strings after each build and adds them to the localization catalog
- Single file management: A String Catalog manages all translations in one single file rather than separate files for each language
- Built-in pluralization: Handle singular, plural, and zero cases without complex code
- Device-specific variations: Different text for iPhone, iPad, Mac, etc.
- Export/import workflow: Easy collaboration with translators using .xcloc files
What Are String Catalogs?
Introduced in Xcode 15, they replace the traditional .strings and .stringsdict files with a more modern, unified approach to localization.
Internally, a String Catalog is represented by a JSON structure that contains all your app’s translatable strings and their translations in every supported language.
Prerequisites
Before starting, ensure you have:
- Xcode 15 or later
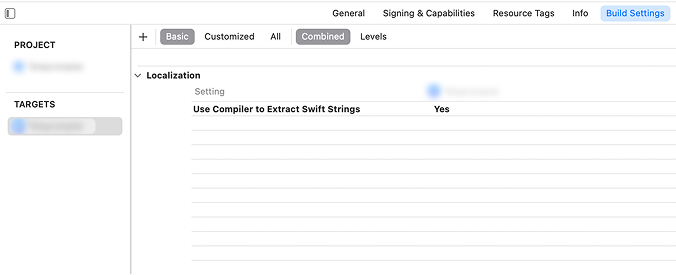
- Use Compiler to Extract Swift Strings set to Yes in your project settings
To check this setting:
- Select your project in the Navigator
- Go to Build Settings
- Search for “Use Compiler to Extract Swift Strings”
- Ensure it’s set to “Yes”
Step 1: Create a String Catalog
Select File\New\File from Template from the menu (or cmd+N):
- Open the template chooser: Press
⌘+Nor go to File → New → File… - Filter for String Catalog: In the template selector, search for “String Catalog”
- Name your file: Leave its name as Localizable (this is the default and recommended name)
- Save the file: Choose your project’s main directory
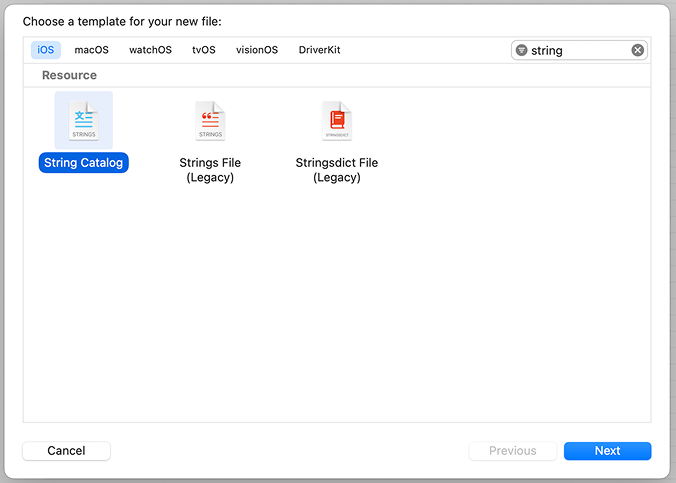
Xcode will create a file named Localizable.xcstrings in your project.
Step 2: Enable Base Internationalization
This is only relevant if you are using storyboard. If not, continue to step 3.
Base internationalization separates user-facing strings from .storyboard and .xib files:
- Select your project in the Navigator
- Go to the Project (not Target) settings
- Under “Localizations”, ensure “Use Base Internationalization” is checked
Step 3: Build Your Project
You need to build and run your project. This will cause Xcode to search your files and collect all string resources into your string catalog.
- Build your project: Press
⌘+Bor go to Product → Build - Check your String Catalog: Open the
Localizable.xcstringsfile - View collected strings: Xcode automatically detects and adds localizable strings to the String Catalog every time we build the project
Step 4: Add Languages
From the Project Navigator ➞ Select the project name. Under Localizations, click the plus (+) symbol to add the languages and regions you want to support:
- In your String Catalog: Click the “+” icon at the bottom of the Localizable file window and select French (or your desired language)
- Alternative method: Add languages in Project Settings → Localizations section
Step 5: Add Translations
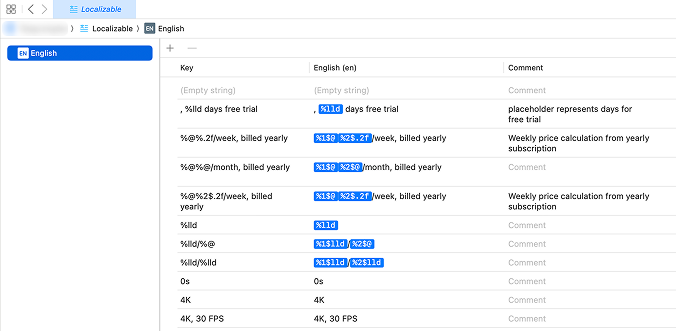
Once languages are added:
- View translation progress: You will notice the text is automatically populated into the new language file with the percentage of the translation progress
- Add translations: Click on each untranslated string and provide the translation
- Track completion: Once you add a translation for each key, the state column displays a green checkmark indicating that string has a localization
![]()
Pro Tip: If you want to translate your apps automatically in a few seconds to 40+ languages instead of doing everything manually, check out the Transolve Platform
Advanced Features
Pluralization Support
Right click the entry and choose Vary by Plural and you can see one and other options in two lines:
- Right-click on a string entry
- Select “Vary by Plural”
- Add translations for zero, one, and other cases
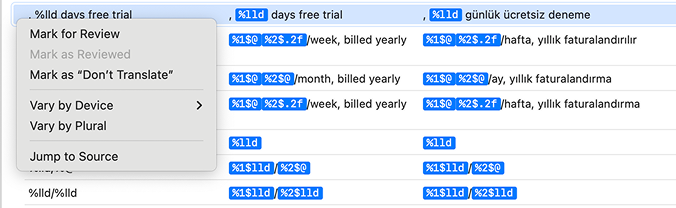
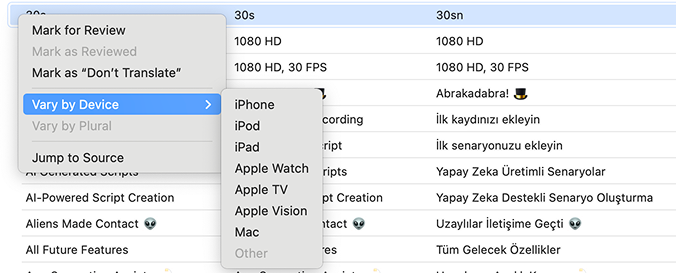
Device Variations
Right click on the string in the Localizable file and select “Vary by Device\Mac”:
- Right-click on any string
- Choose “Vary by Device”
- Select the device type (Mac, iPhone, iPad, etc.)
- Provide device-specific translations
Import & Export
Once you’ve created your String Catalog and added your languages, you’ll likely want to collaborate with professional translators or share your localization files. Xcode provides built-in export and import functionality for this workflow.
For a complete guide on how to export your strings for translation and import completed translations back into your project, see our detailed tutorial: How to Import and Export Localization Files in Xcode.
Testing Your Localizations
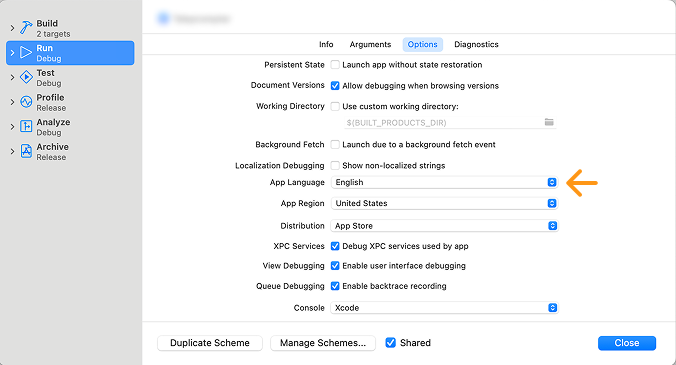
To test your localizations:
- Change scheme language: Edit your app’s scheme and select a different Application Language. Go to Product -> Scheme -> Edit Scheme -> Scroll down to “App Language” and change it to the language you want to test
- Or change simulator language: When testing the localizations on the simulator. You have to change the language on the simulator itself not just the language in the Xcode target
- Run your app: Verify that strings appear in the selected language
Migration from Legacy Files
Right-click on the “Localizable.strings” file and select “Migrate to String Catalog”:
- Find existing .strings files: Locate your current Localizable.strings files
- Right-click and migrate: Choose “Migrate to String Catalog”
- Select files: Xcode will show you a dialog to select which files to migrate
- Complete migration: It uses all the values from your previous strings file and collects all your translations
Important
It’s important to note that Xcode will only automatically detect and add strings to your String Catalog if they’re properly marked as localizable in your code.
In SwiftUI, any string literals used within Text("Hello World") views are automatically localizable.
For other cases, you’ll need to explicitly wrap your strings using String(localized: "Your text here") for iOS 15+ and Xcode 13+, or the traditional NSLocalizedString("key", comment: "description") macro for older versions.
Hard-coded strings that aren’t wrapped in these localization methods won’t appear in your String Catalog, so make sure to use these approaches for any user-facing text in your app.
Once you build your project after adding these localized strings, Xcode will automatically detect them and populate your String Catalog accordingly.